Can you decoupage glass. How to decoupage glass jars. How to make decoupage glass plates. Diy decoupage glass bottles. Decoupage diy tutorials.
Types and peculiarities of decoupage on glass.
Table of Contents
Among modern types of handicraft, decoupage occupies one of the first places. As demand creates supply, craft stores are full of all kinds of decoupage blanks and materials for decoupage for every taste and pocket. More often beginners begin their hobby with glass blanks. Why? It is very easy – you can find blanks for decoupage on the glass in every home – jars, plates, bottles or vases. Almost every housewife has something from listed above. Moreover, step by step master-classes of glass decoupage with photo can be easily found on the Internet. And now you may ask yourself: “How can you decoupage glass?” And I’ve already prepared an answer for you.
Peculiarities of decoupage on glass
Despite the availability of decoupage on glass, it has features that must be taken into account when working. The key to quality work is surface preparation – the glass should be well washed from dirt and degreased with acetone or alcohol. You can use simple acrylic primer for priming. You can also use the so-called “composition for complex surfaces”. Experienced craftsmen use alkyd solvent-based primers for this purpose. One of the most convenient options is an aerosol primer for metal.

If using a conventional acrylic primer, it’s a good idea to process the surface with sandpaper before degreasing it. Thus, tiny scratches will be formed on the glass, which will strengthen the adhesion of the primer to the surface. If you ask me: “Can you decoupage glass on every bottle found at home?” The answer is very simple – yes, almost every bottle will do.
If the first layer is prepared correctly, further work with the glass is no different from working with other surfaces. A standard set for classic decoupage will be enough – a picture, acrylic paints and varnishes. As for the tools – synthetic brushes and foam sponges will be needed. As decoupage is quite a wet activity, it is worth preparing beforehand paper towels or something that absorbs water well.
Direct decoupage on glass

Decoupage on glass is divided into two types: direct and reverse. This division was made based on the main feature of glass – its transparency. Direct decoupage on glass is a real classic, it is the first thing that beginners try. So, how can you decoupage glass?
In general, the direct decoupage on glass step by step is done as follows:
- Clean the surface of dirt, degrease it. Next, do not touch clean glass with your hands, or wear gloves so as not to stain the workpiece.
- Prime the glass with a special primer for complex surfaces. If it is not available, we can use a universal acrylic primer and additionally cover the entire workpiece with a layer of matte acrylic varnish – it will serve as additional protection of the primer from further wetting. Dry the work well. How exactly can you decoupage glass? You will learn in a moment.
- Glue the chosen motif to the prepared surface with decoupage glue. If you have chosen to work with a napkin, the “file” method will be the best. In all other cases, you can simply attach the motif to the surface soaked in glue and flatten the paper with a brush of glue, pushing out air bubbles. Then we should again dry the workpiece until the glue dries completely.
- Depending on the idea, paint the work with acrylic paints. You can use stencils and structural paste to apply volumetric elements. Then again leave everything for a while, letting the materials dry.
- Coat the work with a protective layer of acrylic varnish, implement all the ideas about decoration (different ways of aging, gilding or something else), cover the work with three coats of finish varnish. Of course, don’t forget to dry each layer.
- Enjoy the result.
Reverse decoupage on glass
Reverse decoupage is an even more interesting type of decoupage. It received its name because of the specifics in the application of layers. Most of them are applied in reverse order. For this kind of decoupage only transparent blanks without a pattern are suitable. Priming the surface during reverse decoupage is not necessary, and the motif should be glued inside out. It is very important in this case to fix the decor with a quality varnish coating because there are no other ways to hold a paint and varnish layers reliably for the reverse decoupage.
Already eager to know how can you decoupage glass? It’s time to learn. The procedure for reverse decoupage is as follows:
- Wash the product from various dirt, degrease it with alcohol or acetone.
- Glue the picture, place a colorful layer facing down. Glue the tissue using the file method, other types of paper should be put on the glass soaked with glue. Then press the whole thing from above with a brush soaked in glue, removing the air from under the paper. Let it dry.
- If you have chosen a tissue motif – after drying, it should be painted on top with white acrylic paint (you can use a universal primer). It will give brightness to the image.

Then paint the work with acrylic paint. After drying, cover the workpiece with a protective layer of varnish.
To give the work a finished look and aesthetics, it is better to apply another even layer of paint and two or three layers of protective varnish. Let it dry and appreciate the finished work.
Very interesting results are obtained by combining direct and reverse decoupage on the same object, for instance, on bottles with flat edges.
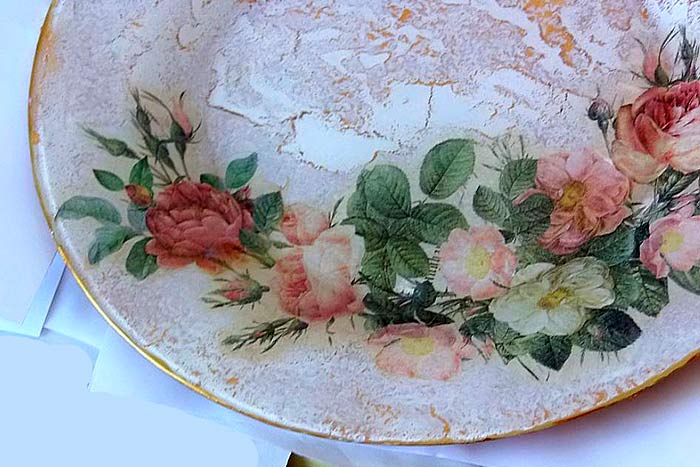
Decoupage on glass, both direct and reverse, among other things, is very practical. In glass jars and bottles decorated in this way you can store various products, and plates with reverse decoupage can become a decoration of the holiday table – you can put fruits or sweets on them. The only restriction for such dishes – wash them carefully without soaking and don’t use abrasive detergents. If you follow this rule, your decorated items will last for many years.
Decoupage diy tutorial.

You need to paint a glass bottle with white paint.
Glue the paper tissues with PVA glue on the bottle.

Take the cord and glue it to the bottle.

Video tutorial.
See related posts


Wire wrapped tutorials PDF Valeriy Vorobev