Decoupage tray DIY ideas. Decoupage Trays Tutorials for beginners.
Many people like to decoupage various items. Often hostesses decorate various kitchen utensils, including trays. Today we will talk about what ways you can decorate these items and also you will get some ideas for inspiration.
Preparing trays for decoupage.
Table of Contents
If you decide to decorate a tray made of wood, you will need to sand it so that the surface is smooth. If you find chipping and depressions on the product, then fill them with putty. The surplus should be removed afterwards.

When decorating metal and plastic objects, it is also necessary to sand the surface. In addition, they must be degreased in advance. This procedure can be carried out with medical alcohol, organic solvents or special emulsion products.

Nowadays, there is a huge variety of master classes on decorating tea trays in the decoupage technique. Here are a few instructions for beginners.
Decoupage of a metal tray with napkins and acrylic paints
Before decorating, the object should be sanded and degreased. After that, a primer is applied to the object. It is best to do this with a sponge.
Then it is necessary to choose napkins, that have interesting drawings on them and are suitable for decorating. The pictures should be carefully cut out and glued to the product using glue. It is the basics of decoupage tray.
The background of the images should be painted with acrylic paints of different colors. After the picture has dried, the product is coated with a matte-based protective varnish on top.


Decoupage of a wooden tray.
The tray should be sanded, degreased and primed beforehand. The art primer should be applied in 2 layers. Then it is necessary to choose large napkins with suitable pictures in the Provence style.
The pictures should be carefully cut out and glued to the surface of the product. On top, everything is covered with several layers of acrylic-based protective varnish.
Additionally, the tray can be decorated with small painted images in this style. Decoupage tray is very easy.

Decoupage of a wooden tray with an antique effect and craquelure.
The tray should be sanded and primed beforehand. Then, if desired, you can apply pictures from paper napkins to it. After that, everything is covered with varnish and then we should wait until it dries completely.
Next, a craquelure is applied to the product. This is what will create the old-style cracks on our tray.
Their grouting should be done only with oil paints of bright colors.
It is better to decorate the sides of the item with a candle. You can rub several areas of the product with a candle randomly. In the end, the tray is covered with varnish.

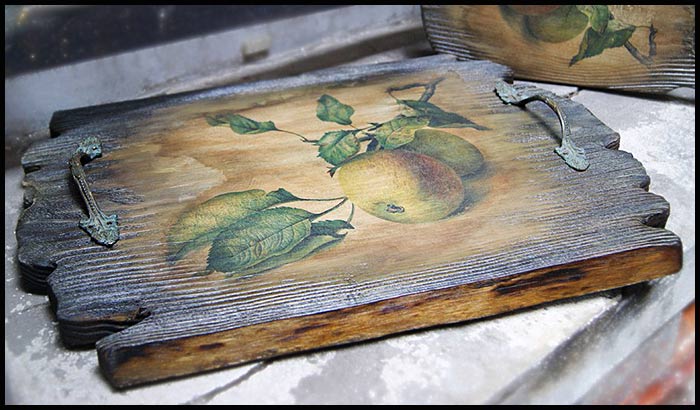
Decorating a wooden tray with a printed image
First, choose a picture for the decoupage. Then it is necessary to examine the tray for irregularities and chips. If there are any, then they should be covered with putty, and then the surface should be sanded.
At the same time, you need to take the paper and glue tracing paper to it. After that on this surface, the selected pattern will be printed. The finished image then should be soaked in water.

After a while, it should be taken out and placed on the punched pocket. Excess moisture should be removed. The drawing is then smeared with an adhesive mixture. The punched pocket is attached to the item. At the same time, it is necessary to gently remove all of the bubbles that form using your hands.
Pay attention to keeping your fingers wet. Otherwise, you may accidentally erase a fragment of the picture. As you can see, it is very easy to decoupage tray.

The tray should be dried completely. If small irregularities remain on the image, they should be carefully removed. On top, the surface is covered with several layers of protective varnish.
After that, it is recommended to carry out underpainting to make the decor look more interesting and beautiful. To do this, you need to choose the appropriate shades of acrylic paints for the picture. They are mixed together. The resulting tones are used to paint on the image.
In the end, everything is once again varnished with a matte acrylic composition. And it should be applied in 8-10 layers. The tray is thoroughly dried again. Drying is very important when you decoupage tray.

Decorating a tray in vintage style
The tray is sanded and coated with black primer. Then white paint is applied to it. This should be done in two layers.
It is better to use a brush with stiff bristles, which can give texture.
The white coating after application should be slightly wiped off with a terry towel. This is done to create a slight scuff on the surface

At the same time, you need to prepare a printout of the vintage style picture. Smear the front side of the image with an acrylic-based varnish. The image is glued to the surface of the tray.
The image is pressed down with a putty knife or paint roller. The product should be completely dried after that. Then the white layer of paper is carefully rolled out. To do this easily, it is necessary to slightly moisten it with water. while doing this a picture will appear.
The sides of the tray can be decorated with stencils and black acrylic paint. In the end, the finished product is coated in several layers with a protective varnish.

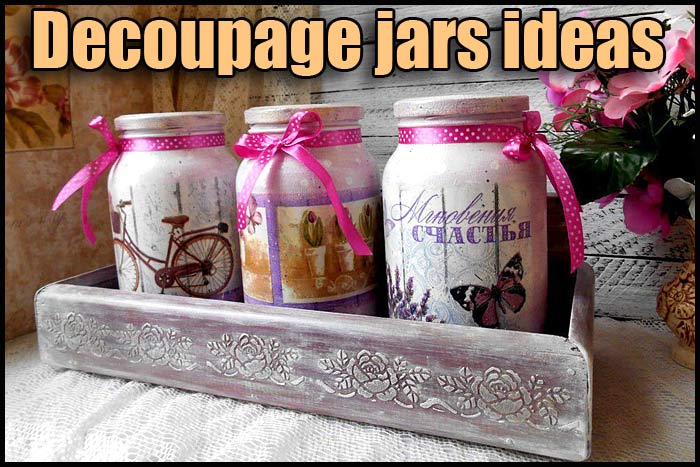
Decoupage tray in chubby chic style
The tray is treated with one coat of art primer with a brush or foam rubber sponge. After drying, a brown color coating is applied to the product.
In some places, light green paint may be applied on top of the brown paint. This method will allow you to make the transitions in shades smooth.
At the same time, it is necessary to carefully rub the sides and all corners of the object with a candle.
Then, the tray is completely covered with white acrylic paint. Wait for the item to dry completely after painting. Then those places which were rubbed with a candle should be treated with sandpaper. Just try this tutorial and decoupage tray with me.

After that, you need to take suitable three-layer decorative napkins for decoupage. The pictures depicted on them should be neatly cut out and applied on the front side to the punched pocket or plastic bag.
Pictures can be made with uneven torn edges, which will make the design more interesting.
Dilute PVA glue with water. The resulting glue is applied with a brush to the back sides of the images. Pictures are placed on the tray and smoothed with hands to avoid bubbles and other irregularities.
In the end, several small stamps can be applied to the tray to complete the style. After that, a colorless protective varnish is applied for decoration. The product is left to dry. This is almost the end of our today’s decoupage tray tutorial.

Recommendations
If you decide to decorate your tray in an antique style by firing, remember that after such a procedure, it is recommended to clean the wood with a stiff brush. This will allow you to remove all unnecessary burnt particles. In addition, it will give the wood a beautiful natural relief pattern.

Do not forget to coat the tray with acrylic varnish in several layers after the decoration. It is necessary to dry the old coating before applying a new one. Varnishing will keep the product in pristine condition for a long time.

If you want to decorate a tray with the effect of artificial aging, then use craquelure. Thus, you can create decorative cracks on the surface of objects.

This effect can also be created by brushing. In this case, you need to scrape some of the wood fibers from the surface of the tray. This can be done with brushes with stiff bristles.
Remember that you need to be as careful as possible with the sandpaper. It is necessary to work with such material without any effort. Otherwise, it may erase some of the acrylic coating.

If you want to create a slight layering effect when decorating, you can make a see-through pattern from below. To do this, another thin layer of primer is placed on top of a layer of colorless lacquer. It is then wiped off with a sponge in the areas where the pattern is located.

See related posts


Wire wrapped tutorials PDF Valeriy Vorobev