Easy Paracord Bracelet Instructions. Cobra Stitch Instructions. How To Make Your Own Survival Bracelet. Paracord 550 Survival Bracelets.
Paracord 550
Table of Contents
A bracelet made of paracord will be not just a fancy accessory but also a useful piece of equipment. This will be a good project for you if you enjoy being outside or if you want to make a gift for someone who enjoys being outside. This thing is perfect for active people.
Each bracelet has 10 feet of 550 paracord, thus making it a compact survival kit. So it can be extremely useful for you. Use the yarns in the central core to make an emergency shelter or to repair your rucksack. There are hundreds of ways how to use it.
Paracord is a tough material. It was first utilized in the suspension lines of US parachute during WWII. The “550 cord,” which is commonly used in paracord bracelets, has a breaking strength of 550 pounds (250kg). So, it can hold the weight of an adult without breaking.
If you haven’t considered getting a survival bracelet yet, now is the moment. You never know, when it may be needed. You can make it not only for yourself, but for each and every member of your family as well. And even for your pet. As for me, I made a paracord bracelet for almost every friend. Surprisingly, the paracord bracelet has evolved into more than a “survivalist accessory” – nowadays people like these kinds of accessories. It became fashionable, with a large number of people purchasing or making their own.
The bracelet is actually very simple to make. It may look complex, but trust me – it’s easy-peasy. Don’t look at the length of this article – it may be quite long, but it’s I included numerous photographs for each stage. So most of the information are photos. You will complete your first paracord bracelet in around 20 minutes.
First and foremost, take your…
Easy Paracord Bracelet Instructions. Materials.
2 1/2 feet (75cm) of paracord
10 feet (3 meters) of paracord

Scissors
Ruler
Gas lighter

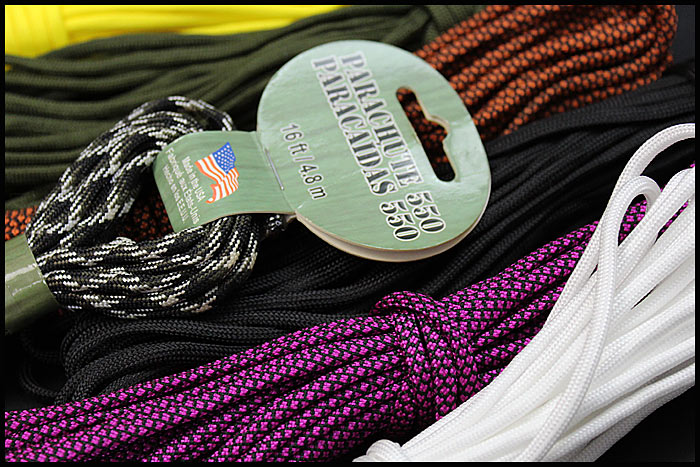
The most commonly used paracord bracelet cord is known as “550 cord.” It has a diameter of around 1/5″ (5mm). It’s available everywhere – in army surplus stores, camping and outdoor stores, and, of course, on eBay.
Easy Paracord Bracelet Instructions step by step.

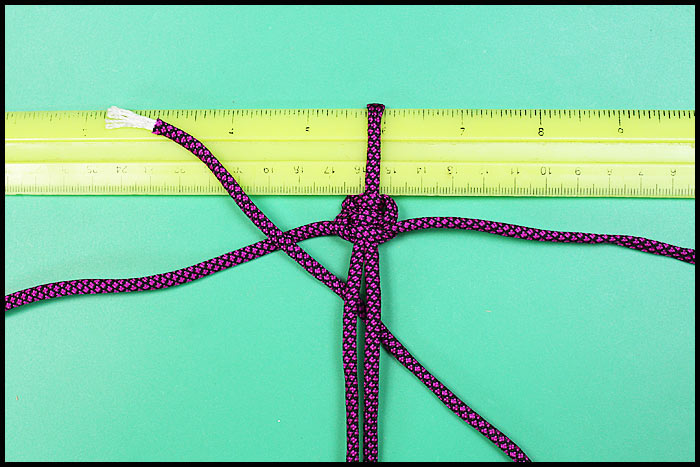
Take the 2 1/2 foot piece of paracord. Make a simple overhand knot an inch or two from the free ends. As an example:

Put the loop over the knot to check the bracelet’s size, as shown below. This is how the bracelet should look like:

It’s nice if the bracelet is a little loose. When the band is finished, it will get fatter and more snug. Don’t stress about getting the size just right at this point; you can fine-tune it a bit later.
Cobra Stitch Instructions.
Secure the knotted cord in the clip.

You can use special tools for weaving bracelets.

You can tape it to the table or you also can use a narrow ruler.
Arrange the paracord segments in a “t” shape, with the long, linked piece in front of the short piece. The long piece’s connection should be precisely underneath the short piece.

The cobra stitch, also known as a Solomon bar or Portuguese sinnet, is the next knot. Whatever you want to name it, it’s quite simple.
Let’s start weaving from the left side. We place the cord as shown in the photo.

Place the cord on the right side as shown in the photo.

Easy Paracord Bracelet Instructions

And tighten the knot.

Begin to knit the next knot on the right side.

The left cord.


Tighten the knot.

Next, we begin to knit a knot on the left side.

The right cord is next.

Tighten the knot.

And the right cord again.


I hope you figured out how to knot alternately. Alternate sides as you add more and more cobra stitches.
By holding the overhand knot at the bottom of the bracelet and pressing the cobra stitches up toward the loop at the top, you may gather the stitches closer together. To keep the stitches from falling off the top, put something through the loop beforehand, for example, a ruler.
Continue to add cobra stitches until you’re about 1/2″ (1cm) away from the granny knot at the bottom. After you’ve completed all of the cobra stitches, your bracelet should look like this:

Extra tip: Sew the end-most cobra-stitch to the central core of paracord with needle and thread. This prevents the cobra stitches from slipping down the center core and ensures that the 1″ loop at the end remains the same size.

Check the fit by wrapping the bracelet around your wrist. To make the bracelet tighter or looser, change the position of the overhand knot.
Tidy Up Loose Ends
After you’ve double-checked that your bracelet is the proper size, cut off all the loose ends. The overhand knot will leave two loose ends, and the cobra stitch will also leave two loose ends.
Begin by tying up one loose end. Cut it short enough to protrude from the bracelet by about 1/4″ (5 mm).
With a lighter, melt this end, then place a moist finger on the molten end (or the flat edge of a knife). This prevents it from fraying. Additionally, pushing on the end squashes it into a mushroom form, which prevents it from working loose. Just make sure you don’t burn your fingertips!
Carry on with the rest of the loose ends.
To demonstrate what I mean, here’s a photo of one of the molten ends.


We are done. Your bracelet is now complete. Isn’t it cool?


With my step-by-step video tutorials, you can learn how to make the cobra stitch and then use it to make a paracord lanyard or bracelet.
Easy Paracord Bracelet video Instructions.
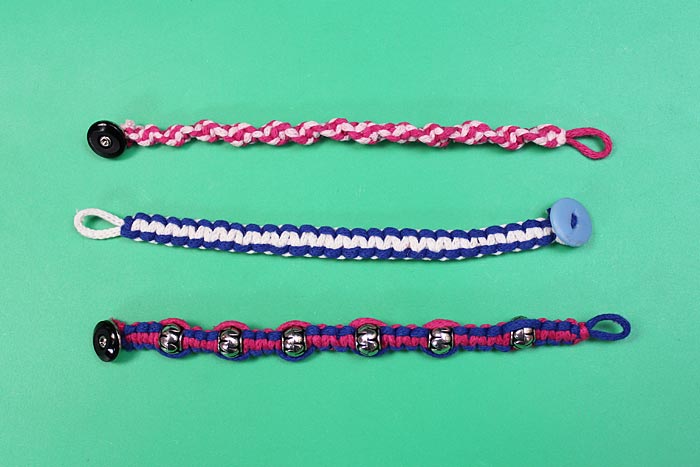
Two color paracord survival bracelet with buckle. Cobra Stitch.
Need Two 5 feet pieces of paracord of any color.
See related posts:

Wire wrapped tutorials Valeriy Vorobev