How to Add a Snaps to Leather. Step by Step Tutorial for beginners. How do you put snaps on a leather bracelet?
Snap closures are a convenient and cost effective way to add secure closures to leather pieces. Snap setting, on the other hand, is a difficult job for many leather craftsmen. You’ll need some special tools and materials in order to add a snap to leather. But don’t be afraid – the process is much simpler than it seems.
How to Set Snaps in Leather. Punching Holes for the Snap Components
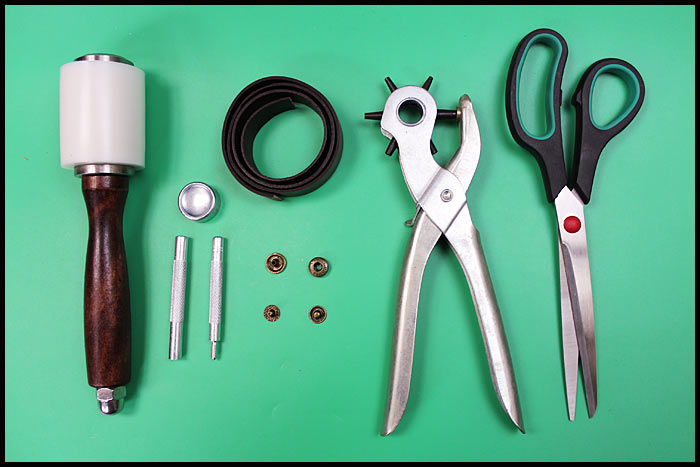
Gather your supplies. It’s simple to add a snap closure to leather, but you’ll definitely need some special tools and materials. You’ll need the following items before you start:
A snap closure kit may be purchased in the sewing shop. Usually it includes all or most of the components needed to add a snap to leather. All of the snap components should be included in this kit, as well as a setting tool, which looks like a small metal rod.
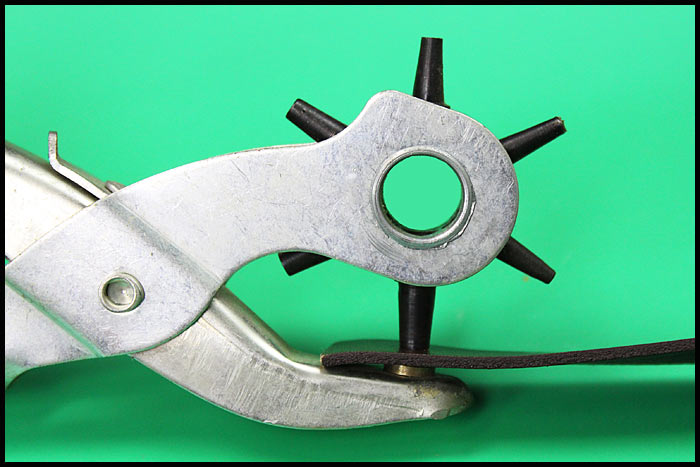
A hole punch that is used to add snaps to leather. Some snap kits have a hole punch included. So, before purchasing the kit, check to see if it comes with a hole punch. If it doesn’t have one, you can get a single hole punch that suits the snap you’ll be using, or you can get an adjustable punch. It has several settings for various hole punches. So, it is a very convenient item.

A mallet made of rawhide or rubber. A rawhide or rubber mallet should be used to hammer the snaps into place. Otherwise a metal hammer may damage the snap components.
A piece of leather that you are going to add the snap to.
Scissors. We will need to cut the leather, so you’ll definitely need a pair of scissors.
Pencil, pen or marker.
Setting anvil (optional). A setting anvil looks like a small metal block. It has a concave top that can be used to add a curved cap to a snap. You may also use a rough, durable surface like a work bench, table, or concrete floor to set the snap. If you’re working on a surface that could be damaged by a hammer, such as a wood table, it’s not a problem. Just put down a book or another heavy hard object. It will help us to protect the surface.

Measure the length of a leather strip. Remember to leave a 3/4” overlap for the snaps on both ends of the strip. Next, we will need a pencil, pen or even a marker. Make a mark on the leather where you want the snaps to go. Then cut the leather.

In order to decide where the snap should go on your leather, take a measurement. The snap closure parts should be put around 3/4” (1.9 cm) from the ends of your leather. You must be sure if you have enough extra leather to do this. But you should also secure the leather the way you like it. Measure the leather and draw a line where you want the snap closures to be.
The size of the holes should be determined. To find the diameter measurement of the snap closure check out the packaging. It should be written there. This is the measurement you’ll use to figure out how big the holes in your leather should be.
For e.g., if the snap is 1/2” (1.3 cm) in diameter, the hole must be 1/2” (1.3 cm) in diameter as well.
Make the holes. When you’re ready to punch holes, put the hole punch over the marked place and punch the holes. In case you’re using an adjustable hole punch, all you have to do to make the hole is to squeeze the punch. If you’re using a hole punch that you’ll have to hammer to make the hole, place the punch over the marked area and hammer the punch. As a result, you will make a hole.
Just one hole should be punched at a time. Do not attempt to punch both sides of the leather at the same time.

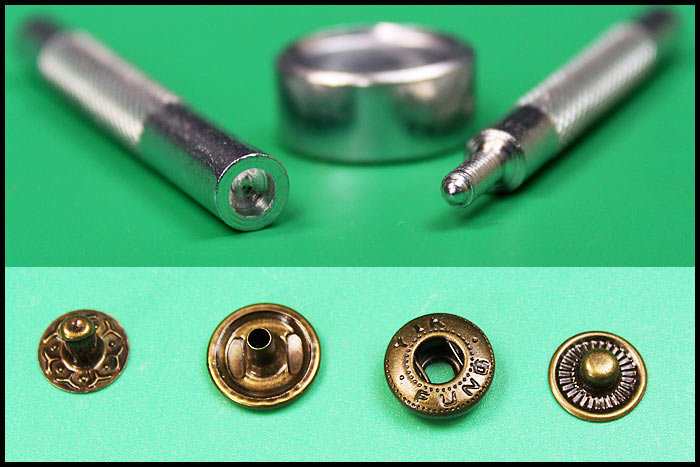
Stack all the components on the anvil’s concave side.
To begin, place the snap’s smooth top piece so that the knob is facing up.
Then, put the leather, but the rough side should be faced up.
Third, attach the snap’s “female” end.
Strike the stack with a hammer 2-3 times while keeping the setting tool vertically.


In order to make the other half of the snap you should just switch to the other end of the leather strip.


Then flip the anvil over to the flat side and stack after that.
Place the rivet-like piece first.
Second, place the leather strip so that the smooth side is facing up.
Place the “nubbin” or “male” piece third.
Strike right on the “nubbin” using a hammer. The round portion should be slightly flattened. It helps to snap the lock together.


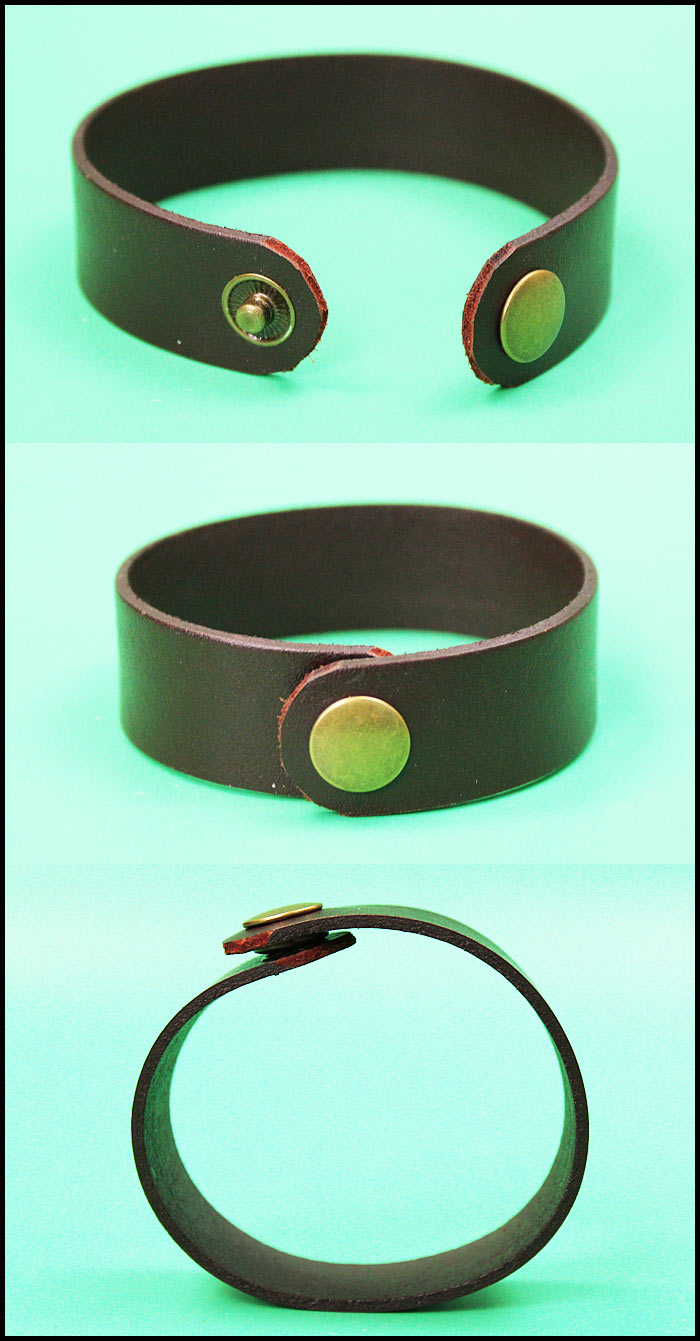
Snap the pieces together, and you’re finished!
Popular posts

Wire wrapped tutorials PDF Valeriy Vorobev