Diy vinyl record clock. Diy vinyl record crafts. What can you make out of old vinyl records? How do you turn a vinyl record into a clock?
Everyone probably has old things at home that no one uses anymore. Have you ever wondered what else it might do for you? I will show you that the new purpose of the vinyl record is no worse than the previous one – we will make a Diy vinyl record clock. In addition, this artwork can be an original gift! Today together with you we will make a wall clock from an old vinyl record. I will show you how to make a wall clock from a vinyl record with your own hands in the technique of decoupage at home.
What’s good about vinyl records for making clocks.
Table of Contents
The vinyl record is a regular round shape.
The vinyl record fits perfectly in thickness.
There is a hole in the center, no need to drill. You may have to enlarge the hole a bit for the clock mechanism.
The vinyl record is lightweight.
Easy to paint, no additional processing required.
Any size can be picked up.
Diy vinyl record clock. Tools and materials:
Old vinyl records in various sizes

Figures can be made from plastic, paper or you can paint the numbers with help of a stencil.

Clock mechanism with hands.

Decoupage napkins.
PVA glue.
White paint.
Brushes.
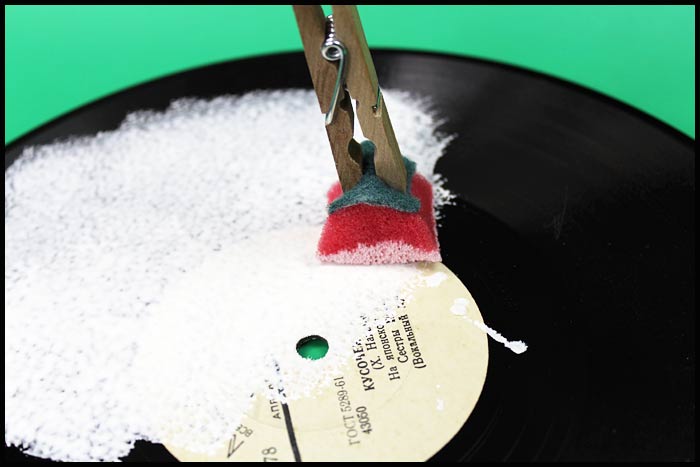
Foam rubber. I use foam rubber for washing dishes. We will need to cut it into pieces and clamp them in a wooden clothespin. It’s quick and easy! And thus, we have made a cheap tool. It is very easy to replace foam rubber that has fallen into disrepair with a new piece.

Decoupage varnish.
Master class 1 – Diy vinyl record clock. Decoupage technique.
I usually mix white paint with PVA glue for the primer. It is a two-in-one option – primer and the first coat of white paint.
Try on the clock mechanism, try to fit it in the hole in the vinyl record. If needed, enlarge the hole with a hand file or circular file.
Wash and degrease the vinyl record.
Prime the vinyl record and dry it. Apply a second coat of paint.
Picking up a decoupage napkin.

I usually tear out the needed area of the napkin with my hands.

Don’t forget to separate the layers of the napkin. Usually, decoupage napkins consist of three layers.

Use PVA glue to glue the napkin onto the vinyl record. Let it dry. Then cover with decoupage varnish.

Next mark the dial. Glue the numbers with any glue.

Fasten the clock mechanism to the vinyl record with a special screw. Next, fasten the hands. First, the hour hand, then the minute hand and finally the second hand. Position all the hands one above the other so that they point in the same point. Insert the battery into the clock mechanism.


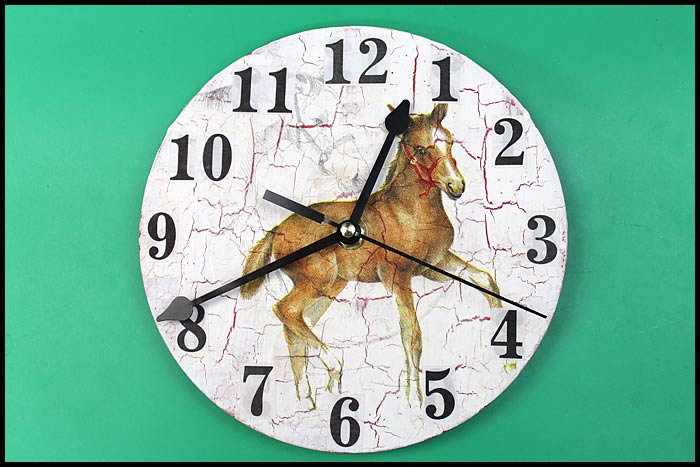
A Diy vinyl record clock is done!

Master class 2 – Clock made of vinyl records. The technique of decoupage with craquelure.
In this master class, we will use the one-step craquelure medium – Krakelee-Medium, Marabu, Germany.
I took a small sized vinyl record. I washed and degreased it.

The best option is to choose a primer of the right color. Let me explain why.
The bottom layer of paint will have the cracks of the craquelure. It is desirable to choose contrasting colors for the bottom and top layers of paint.

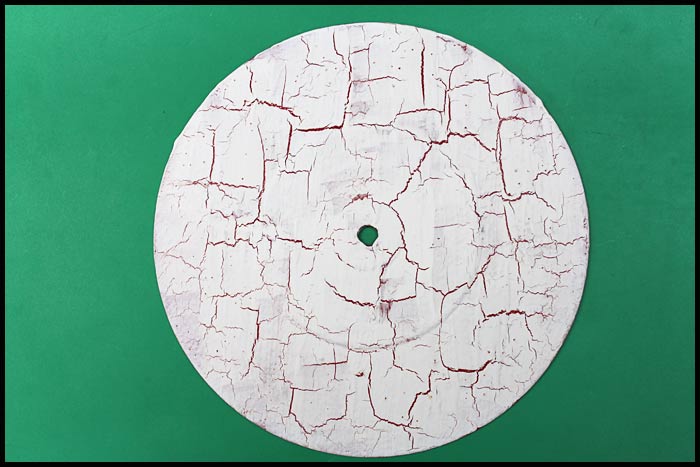
My bottom layer is red-brown. After the paint dries, apply the medium with a brush to the vinyl record. It is desirable to cover it with a brush in one direction. Wait 20 minutes. Then from above apply a thin or thick layer of white acrylic paint (the thicker the layer, the deeper the cracks). The surface with the medium should be covered with only one coat of paint; repeated brush strokes on the same spot can destroy the craquelure effect. Allow the paint to dry completely (at least 1 hour).
Pick up a decoupage napkin. Cut or tear out the pattern. Separate the layers of the napkin (usually a napkin has three layers). Next, glue the decoupage napkin (the top layer) on the vinyl record. I used PVA glue for this.


I cut out the figures for the clock from a desk calendar. I glued them with the same PVA glue.


After everything had dried, I coated it with colorless decoupage varnish.

It remains only to fix the clock mechanism with hands on the vinyl record. Assembly is performed in the same way as in the previous master class. Insert the battery into the mechanism.

Diy vinyl record clock using decoupage technique is ready!
If you still have old records lying in a far corner of your home that you just can’t throw away, and you won’t listen to them anymore, it’s time to give them a second life. All it takes is time and a good idea. Diy vinyl record clock is always fun to make, trust me!
Popular posts:


Wire wrapped tutorials PDF Valeriy Vorobev