Tools for polymer clay. How to use clay tools. How to use polymer clay for beginners. DIY polymer clay jewelry.
Polymer clay – this material is truly unique, if you’re creative enough its functionality has no limits. This magical composition can be used to make many things: children’s toys, dolls, jewelry, souvenirs, dishes, decorative objects and more.
Of course, the brilliant result is achieved not only due to the experience and imagination of the master but also with the help of special tools for polymer clay.
Types of tools for polymer clay.

Tools for polymer clay. Flexible blades
Table of Contents

They can be used to make a straight or rounded cut. Depending on the length, the blades are used in different ways. The long, flexible ones make curved cuts, while the stiffer and shorter ones are used to cut small parts (for example, sausages).
Sculpting tools

A sculpting tool can be a small stick made of wood, metal or plastic. It is necessary for sculpting small parts from polymer clay and similar materials of similar consistency. It is one of the most important tools for polymer clay.
In the work with polymer clay masters usually use a sculpting tool with 2 rounded edges. It helps them to form large flowers (poppy, rose, orchid) on molds. Usually, it is made of metal.
For detailed working with small details you need to have a sculpting tool with the pointed end (it is usually sharp) – Needle Tool. Needles and toothpicks are excellent for this task.
Mat for clay
If you don’t want to permanently ruin the surface of the table, use mats. It can be any smooth work surface, but not slippery. Both tiled, glass surfaces and A4 paper will do. This is also one of the most necessary tools for polymer clay.
Wooden boards are better not to use, they are quickly damaged, can absorb particles of clay (there is a risk that it can stain the clay).
Tools for polymer clay. Molds.

Silicone casting molds are the 1st important tools for polymer clay when making jewelry: beads, earrings, pendants, brooches. They can be of different shapes and sizes: from representatives of flora and fauna to geometric and abstract figures, etc.
You can’t create three-dimensional products without molds, such as dolls, angels and other souvenirs. Silicone molds are the most popular among craftsmen.
Cutters

The synonym for molds is cutters (these are metal or plastic frames). If you need to quickly make a lot of the same pieces, then you can not do without cutters. They are used just as baking molds in cooking (you can also use them if you want). Just place them on the surface of the polymer clay layer. So never forget about such tools for polymer clay.
Tools for polymer clay. Texture sheets.

Texture sheets help to achieve an unusual effect – a pattern. It is enough to press the sheet with an ornament to the surface of the polymer clay. Then gently remove it and … voila – the instant decorative coating is ready.
Flowers and leaves of living plants are also used as texture sheets for polymer clay. So this is a good option if you don’t have enough tools for polymer clay.
How does it work?

Put a flower or twig on the blank, roll it with a rolling pin, and carefully remove it before baking. It’s a budget-friendly option, but it’s unique, and you can create a new collection of patterns every time.
Acrylic rolling pin

A big advantage of the acrylic rolling pin is that clay doesn’t stick to it, which significantly reduces the time of work and material consumption. It may seem that there are more important tools for polymer clay, but this one will save a lot of time.
Tools for polymer clay. Extruder.

Extruder (came from the verb “To extrude”) is a tool for extruding polymer clay. It operates just like a pastry syringe: clay is extruded through nozzles with holes of different shapes. And as a result, you will get “sausages” with different shapes of cross-sections.
This tool is indispensable when working with polymer clay. It is very difficult to make such “sausages” with bare hands so that they are even. It’s almost impossible to keep the same shape of the cross-section along the entire length.
Using an extruder, you can make blanks and work with such techniques as filigree, kaleidoscope, torn edge, knitting, and extruder. You can make imitation grass, hair for a doll, pasta for a culinary miniature and so on.
There are two kinds of extruders: one with a threaded piston and one without. The most convenient extruder is the one with a thread on the piston. It is easy and quick to squeeze the clay through it, and that is why you should not save money when buying this tool. This is, by far, one of the most necessary tools for polymer clay.
First of all, you need to warm the clay well in your hands and knead it. It should become soft and malleable. If the clay is hard, it will be hard to squeeze it out, and there is a great risk of breaking the tool.

How to use the extruder
The softened clay should be rolled into a “sausage” with a diameter slightly smaller than the inner diameter of the extruder, insert this “sausage” into the extruder, and screw the cap with the selected nozzle.
Now you can squeeze out the clay by pressing or turning the handle of the piston, depending on the type of your tool. After you finished working the extruder needs to be cleaned.
How to Clean an Extruder
To get your extruder clean and free of clay after work, you need to lift and pull out the piston, unscrew the nozzle cap, and wipe them with a dry cloth. If the clay is very sticky, you can gently pick it up with a blade or toothpick.
Use a rolled up tissue to clean the inside of the extruder, and then wipe the piston thoroughly. If you get clay on the threads of the piston or cover, clean them with the tip of a toothpick.
To keep the extruder in service longer, it is a good idea to lubricate the threads on the piston from time to time with household machine oil.
How to replace the extruder
Do not try to replace the extruder with an ordinary or pastry syringe. Although polymer clay is very malleable, it cannot be squeezed out as easily as liquid or cream. You will have to make an effort, and at best you will just get tired. So, some tools for polymer clay can’t be replaced with their analogues.
Squeezing clay through a special extruder, on the other hand, is very easy, especially if the piston is threaded.
Remember that professional tools for polymer clay greatly simplify and speed up the process of creating products from polymer clay. And if you use them correctly, clean and care for them – they will serve you for a long time.
Tools for polymer clay. Pasta-Machine.

If you’ve tried working with polymer clay, you’ve probably heard of a pasta-machine. This device will help you to roll out perfectly flat sheets of the thickness you need. It also knows how to mix 2 or more colors and even can make beautiful transitions.
If you can roll out a layer without a pasta machine, it is unlikely that you will be able to make the desired shade on your own.

What kind of pasta machine to choose?
There are several brands that produce special tools for rolling out polymer clay, but, in fact, they do not differ in any way from the usual pasta machine, designed to create noodles. Therefore, if you happen to find such a device at home, you can safely adapt it to work with polymer clay. The main thing is not to forget that all cookware that got in contact with polymer clay is no longer suitable for cooking and eating in it.
Necessary preparations
Before you start working, hard polymer clay should always be softened so that it can easily pass through the rollers. If the polymer clay is very hard – it can cause the tool to break. So, always care about your tools for polymer clay.
How do I avoid bubbles?
To roll out a perfect layer of clay and avoid bubbles inside, fold the polymer clay in half. Then roll it up and down. Hold the sheet as straight as possible and make sure that the fold of the sheet is vertical. This way, any bubbles in the center will come out on the top and bottom sides as you scroll.
How do I create a perfect gradient sheet?
You should skip the previous tip if you want to create a gradient sheet. Instead, gently fold the sheet of polymer clay in half and run it through the rollers of the pasta-machine several times placing the fold down so that the air bubbles come out on top.
How do I clean the pasta machine?
The first thing to do is clean the clay rollers. To do this, moisten a cotton swab or a piece of cloth with 70% medical alcohol and press it against the rollers, spinning them several times. You can roll translucent or white clay between the rollers to collect any remaining unnoticed pieces of clay. If your pasta-machine is non-disassembled, turn it over and check the inner surfaces of the tool – the surfaces which are in contact with the clay. There may be some clay left. Wipe the surfaces with a damp cloth. Remember to always clean your tools for polymer clay.
Tools for polymer clay. Oven.

An oven for baking blanks. This is one of such tools for polymer clay without which you can’t create anything. In this case, craftsmen are divided into two camps: some use a special oven, others use a household oven. The main condition – the temperature of heating: 110-130 degrees Celsius. If the temperature is lower – the craft may not harden, if higher – it can get melted. A microwave or boiling kettle is no substitute for an oven.
We suggest using a thermometer to check the temperature.

You can easily turn the space of a living room into a craft workshop for the production of polymer clay crafts.
You need a basic set of tools for polymer clay, the dexterity of experienced hands, and an unquenchable thirst for creativity.
Try, risk, create! And you will succeed!
Popular posts:


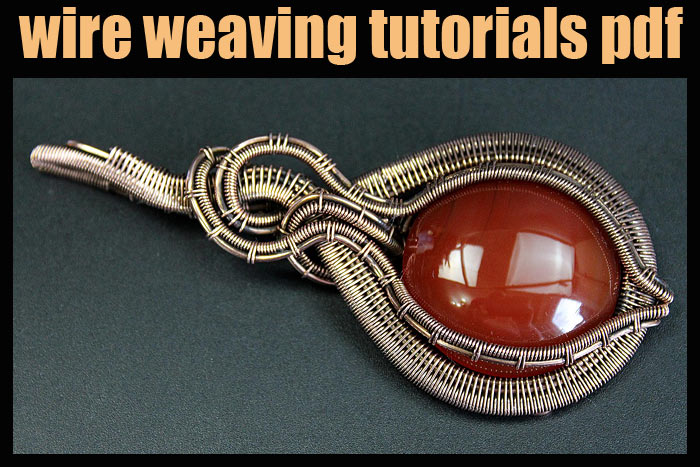
Wire wrapped tutorials Valeriy Vorobev