What is a polymer clay. Polymer clay tutorials for beginners. Is polymer clay easy for beginners? How do I start working with polymer clay? What is the easiest polymer clay to work with?
Sometimes, you look at some kind of brooch, figure or badge and start thinking that you want to make something similar but with your own hands.
In this case, polymer clay will help. But What is a polymer clay? Using this amazing material you can create anything: fun figurines of favorite characters, jewelry, unusual interior and clothing decor, accessories, and much, much more. After processing, polymer clay becomes very hard and resembles plastic.
What is a polymer clay.
Table of Contents
Polymer clay is a material based on polyvinyl chloride. It resembles plasticine in its plasticity, and after hardening, it becomes very hard, like plastic. Other names are thermoplastic, plastic. Depending on the technical features of the processing and composition there are the following types of polymer clay.
Self hardening clay?

Self-hardening clays are also known as air-dried, air-hardening or non-firing. They don’t need and should not be fired in a kiln. Self-hardening clays are generally ceramic clay body formulas with a natural additive, such as cornstarch. It helps to make clays harden.
It is clear from the name, that this plastic hardens when exposed to air for several hours so it’s quiete easy to understand What is a polymer clay. That is why such clay is stored in an airtight container. Several varieties of self-hardening clay are available:
- Heavy clay is similar to natural clay in its properties. Water is added to soften it. After it hardens, the edges of the piece may crumble and the surface may crack;
- Light clay can be quickly rolled out to a thin sheet and is very flexible;
- Cold porcelain clay (white) is very malleable and can be dyed in different shades;
- Liquid self-hardening clay is a thick white or translucent gel, which is needed to create clothes on clay figures. A piece of cloth is soaked in liquid clay and then shaped on the figure with the desired clothing items. After it hardens, it becomes as hard as plastic. Now we understand What is a polymer clay.
Advantages of self-hardening clay:
- If you change your mind and decide to make changes to the work, you can do so within a few hours while it hasn’t hardened yet;
- The surface of the product can be easily cleaned from the stuck things on it at any time;
- This clay can be softened with ordinary water;
- It is suitable for modeling large elements.
The disadvantage of self-hardening clay is that when it drys it becomes slightly pale. So, the color of the product changes a bit. In addition, it is not suitable for small parts.
Baked polymer clay

Baked polymer clay hardens at high temperatures, over 100°C, so a good oven will be needed for finishing. The product is very strong, with a flat, dense surface.
Advantages of baked polymer clay:
- You can paint it in any color, the paint is perfectly applied and holds firmly;
- When drying, colored clay retains the richness of colors;
- Suitable for modeling small and complex elements.
The main disadvantage is it hardens firmly, so small defects in the work can not be corrected. The baked clay is easily covered with dust, so you can sculpt only with gloves on and on a clean work surface. Now we learn about the types of clay and understand What is a polymer clay even better.
Tools and materials
As we already know What is a polymer clay and what are the types of it, it’s the right time to get to know with tools. For comfortable and productive work with polymer clay, you need to get some special tools that will be your faithful assistants at different stages.
For molding and decorating
For example, to make the figure itself and its decoration you will need the following items:

A silicone pad with markings, which serves as a stencil for creating identical elements of the desired shape, and helps to protect the table from clay pieces and cuts. If the pad is heat-resistant, the whole piece can be baked on it;
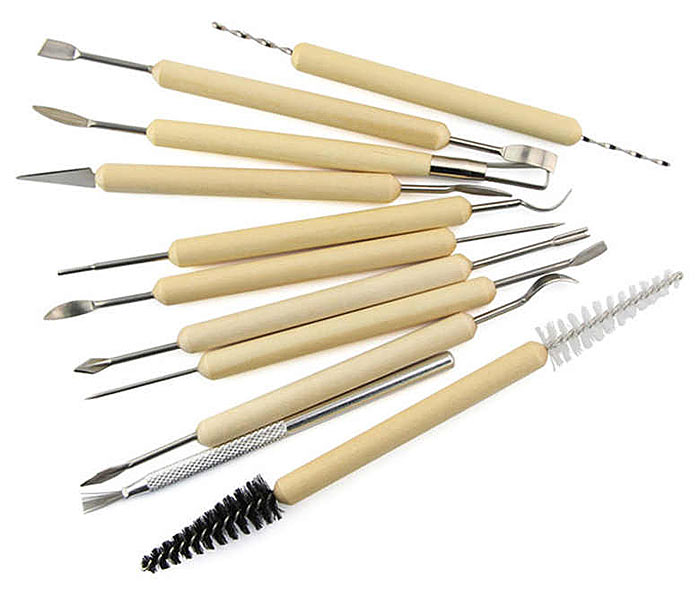
A set of stacks. With help of them you will level the surface of the product, connect the parts, apply patterns and perform many other manipulations where precise movements are needed;
Popular post: Polymer Clay and Foils – gold leaf. Polymer clay techniques.

Clay cutting blades, or a sturdy, sharp office knife can replace them;

Acrylic rolling pin to roll out the clay without sticking to its surface. This makes the sheets of clay even and smooth. In addition, this rolling pin helps you quickly mix different colors of clay and make smooth transitions;

Extruder. It is a syringe with a set of nozzles, like the confectionery tool of the same name. It is used to squeeze out sausages of clay of the desired shape and size;

Paste-machine will save a lot of time and help you quickly make a perfectly smooth thin layer of clay;
Wooden toothpicks are indispensable for baking beads (for keeping the hole hollow and flat) and giving the product the desired texture;

Clay molds. They are usually sold in sets with the most popular configurations. They are used to cut out various figures for decorations, panels and other works;

Stamps and texture sheets are used to create a specific texture;

Silicone molds – thanks to them, you can quickly get almost a finished piece or create any number of identical elements, such as beads.

Working with molds, stamps, texture sheets, and molds is easier when you understand What is a polymer clay and its properties. Prepare a sheet of clay of the desired thickness, press a mold on the sheet, cut excess with a tool, if necessary. The piece is ready. During modeling you may need a special softener. It is necessary if the clay was produced a relatively long time ago and already crumbles in your hands. If polymer clay is fresh and sticky to your fingers, just moisten it with water – it will be enough.
For baking

For baked clay, you need an oven with a precise temperature controller.

Prepare a timer as well: you will have to watch the time very carefully.
Many craftsmen advise placing the pad with the figures in a culinary baking sleeve. During heating, plasticizers evaporate from the clay, which will settle on the walls of the oven. This way you will save yourself from unnecessary cleaning.
As a base for baking clay, you can use parchment or foil. These materials do not stick to clay and do not burn. If it is necessary to bake round-shaped parts, then you will need to make a W-shaped base of foil. The beads will not roll out of it and will not flatten under their own weight.
For grinding
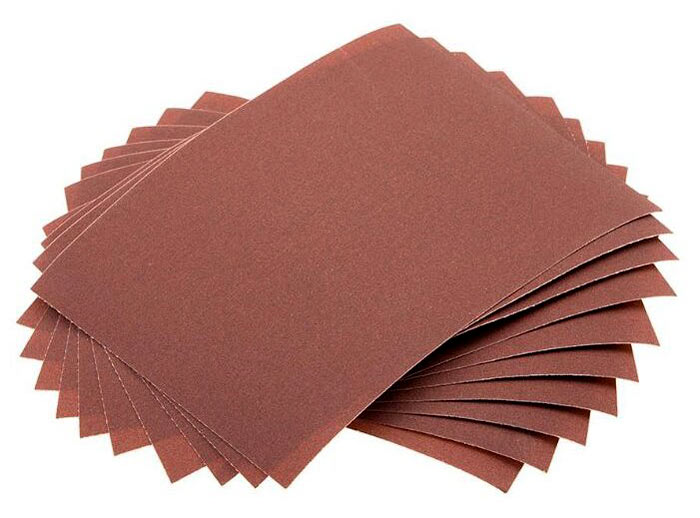
If you want to remove the roughness from the surface of the “baked” product, it is best to use sanding paper grit 600, 800, 1000, 1250 or a multi-sided sanding file for nails

To assemble the product
If the product consists of parts connected by wire or fishing line, you will need a set of three tools:
Pliers – for fittings and wire connections;
Wire cutters – for cutting wire and fishing line;
Round nose pliers – for twisting wire;
Sometimes you need to make a hole for fittings. In this case, a machine with a set of mini drill bits will help. In addition, plastic parts can be joined together using the following types of glue:
- Polymer gel is a special liquid glue for polymer clay, which is baked in the oven;
- Water-based latex glue – it is good because after full drying it becomes transparent and almost invisible;
- Epoxy compound glue – used in jewelry, very strong and transparent;
- Cyanoacrylate-based superglue – this glue hardens instantly, so it is impossible to correct mistakes if you have done something wrong.
To protect the finished product
For this purpose, the product is covered with special varnishes for polymer clay. Transparent water-based polyurethane-acrylic varnish is the best for this purpose, as it dries quickly and forms a thick durable coating.
Varnishes for nails and hair, and also usual acrylic varnishes for plastic products can not be used in this case!
To apply varnish, prepare several brushes of different thicknesses with synthetic pile. You may also need brushes to paint the clay and the sculptures.
How to Bake Polymer Clay?
While everything about self-hardening clay is clear and now we know What is a polymer clay, the processing of baked clay requires strict adherence to a number of rules and manufacturer’s recommendations.
Baking Polymer Clay in the oven.
Most craftsmen use a conventional oven for processing. Microwave ovens are not suitable for this!

Preheat the oven to 110-130°C, referring to the instructions of the clay manufacturer.
Place the product on a pad (ceramic mold or baking tray, covered with parchment, foil) and put it in the oven.
The baking time depends directly on the size of the product. The thicker the layer of clay, the longer it will take – up to 40 minutes.
Allow the product to cool completely without removing it from the oven.
If not, your sculpture will burn, dry out, lose its shape, or start cracking.
How can I bake polymer clay without oven?

Is it possible to bake polymer clay in boiling water?
Boiling does not give a complete cure of polymer clay. You also can use a heat gun, hair dryer or heat-embossing tool set to the desired temperature.
Some masters really prefer to boil the thermoplastic in boiling water. As for me, I do not use that method. But I will tell you how other people do it.
Take an old pot. Pour water into it. Allow the water to boil for a few minutes. On a skimmer gently dip the piece of polymer clay in the water.
Cook for 3-4 minutes + 1 minute for each millimeter of thickness. If it will take more time, it’s okay.
Take out the product and cool it under cold running water.
The disadvantage of this method is that after it cools, a white stain will form on the product. But it can be easily removed with sandpaper. In addition, if you have pre-glued parts, you can not boil such a product.
Polymer clay modeling techniques
When we got acquainted with What is a polymer clay it’s time to learn about modeling techniques. There are many polymer clay modeling techniques, so today we are going to describe the most popular and the most suitable for beginners techniques.
Salt Texture Technique

You need to roll beads of clay and dip them in salt (any salt will do), carefully pressing the crystals in. Bake or boil the beads. Then put them into the water, so that the crystals dissolve. The result will be a beautiful, bubbly texture resembling a sponge or pumice stone.
Millefiori

This technique is also called cane or sausage. It is a rather complicated and laborious technique, but your efforts are sure to be rewarded with excellent results. Cut sheets of the desired color, shape, and thickness. Put them on top of each other in a certain order. Wrap the resulting loaf with a thin layer of clay, squeeze and cut into slices. You will see a pattern on the side of the slice.
Polymer Clay Watercolor Technique

Take three pieces of clay: a basic color, a basic light and a basic dark (for example, black and white, different shades of the same color). Lay them on top of each other in this order: a basic colorful layer, light layer, dark layer, and roll them into one piece until smooth watercolor transitions are formed.
Filigree Techniques

If you decide to create an imitation of this legendary jewelry technique, pass the clay through the extruder to produce thin strips, no more than 1 mm thick. Using these “strands” and their pieces, create a pattern on any base.
Mokume Gane

This technique is a bit like watercolor technique. Take 2 to 6 layers of clay, lay them on top of each other. Stamp them, pressing them well, so that the layers are mixed with each other. Make a cut: it will show an unusual unique pattern.
These are just some of the basic techniques that can be used to make your first ornaments and figurines, and to have a lot of fun while doing it.
How to work with polymer clay?
These answers will be important in the understanding of What is a polymer clay. Useful Tips for Beginners.
- When modeling, take exactly as much clay as you need.
- Before working, be sure to wear work gloves or medicine gloves. Thus you won’t leave any fingerprints on the product. Keep your work area clean: clay can easily pick up dust, hairs and small things.
- Important thing: prepare a large pack of wet wipes, you will use them to wipe molds, tools and clay layers before the work.
- Always work in a well-ventilated room, because when plasticizers evaporate during heating, there is often a pungent unpleasant smell.
- Before baking, put a small piece of clay in the oven to test it, to make sure you have the right temperature.
- Do not be lazy, knead the clay properly, otherwise the finished product will be ugly and brittle.
This is the end of our tutorial. I hope you understand now What is a polymer clay and how to work with it.
Popular posts:
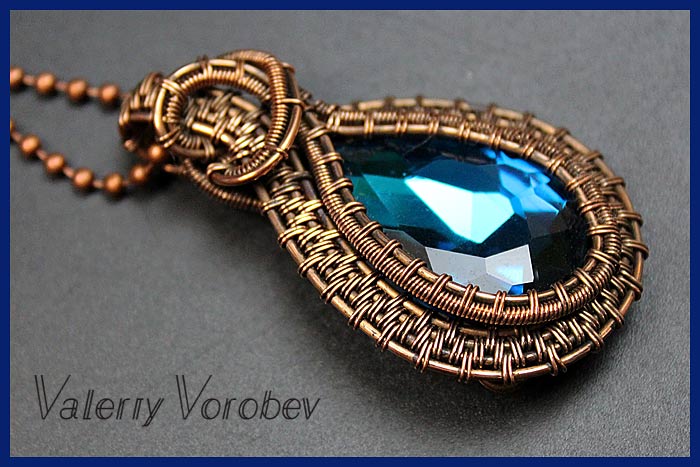

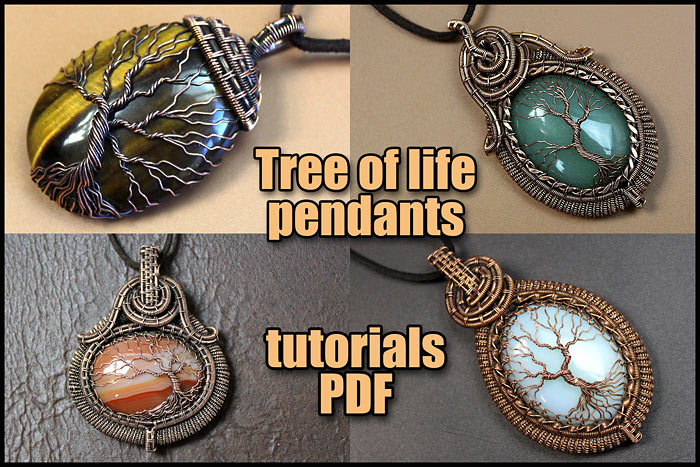
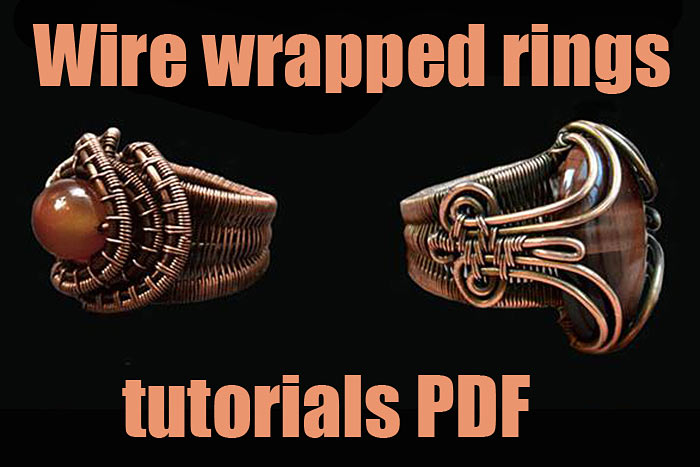
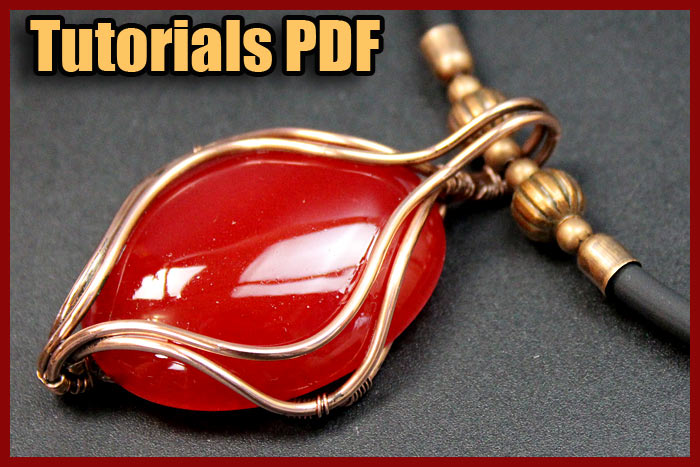
Wire wrapped tutorials Valeriy Vorobev