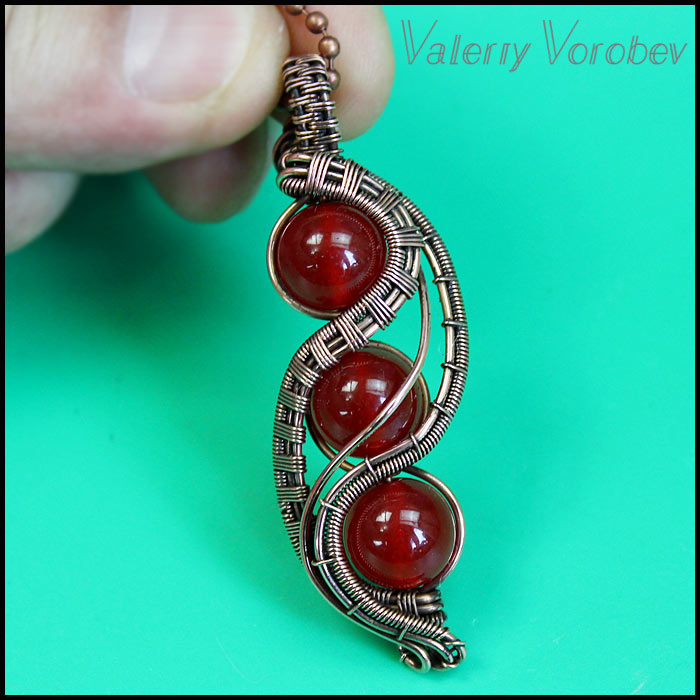
Wire wrapped bead pendant tutorial step by step. What do I need to make wire wrapped jewelry? Free Wire weaving tutorials Valeriy Vorobev.
Today we are going to make a wire wrapped bead pendant.
Step 1. Prepare the copper wire.
Table of Contents
I am going to use copper wire. You can use any other wire of suitable thickness and hardness.
I use natural copper wire for my jewelry. Now I will explain to you why.
Natural copper wire can be patinated and polished. You can make balls on the ends of the natural copper wire by using a gas torch. Natural copper wire can be flattened with a hammer on an anvil.
For this particular pendant, I used a medium-hard 1mm thick copper wire for the base and a soft 0.4mm thick wire for the weaving.
Quite often I use a different set of wires. For the base I may use 0.8mm thick medium stiff wire. For the weaving I may use a soft wire 0.3 mm thick.
When making wire jewelry, you can use a different thickness for both the base and the weaving. The thicknesses I presented above are used by me most often. But I don’t mean to say that I do not use other thicknesses of wire in my jewelry. If I want to make something special – I may experiment with the wire thickness.

Step 2. Prepare the stone beads for the wire wrapped bead pendant.
As a rule, I use natural stones (beads, cabochons, stone cuts) of volcanic origin. Glass will also do.
Beads or cabochons from other materials can be damaged while working, they can be scratched with a metal tool. In the process of patination and polishing, you can also damage them.
Of course, it is also possible to damage a natural stone. But it is much less likely.
I used three beads with a diameter of 10 mm. A 1 mm thick wire will perfectly fit in the hole inside them.
Step 3: What tools do you need to work with the wire.
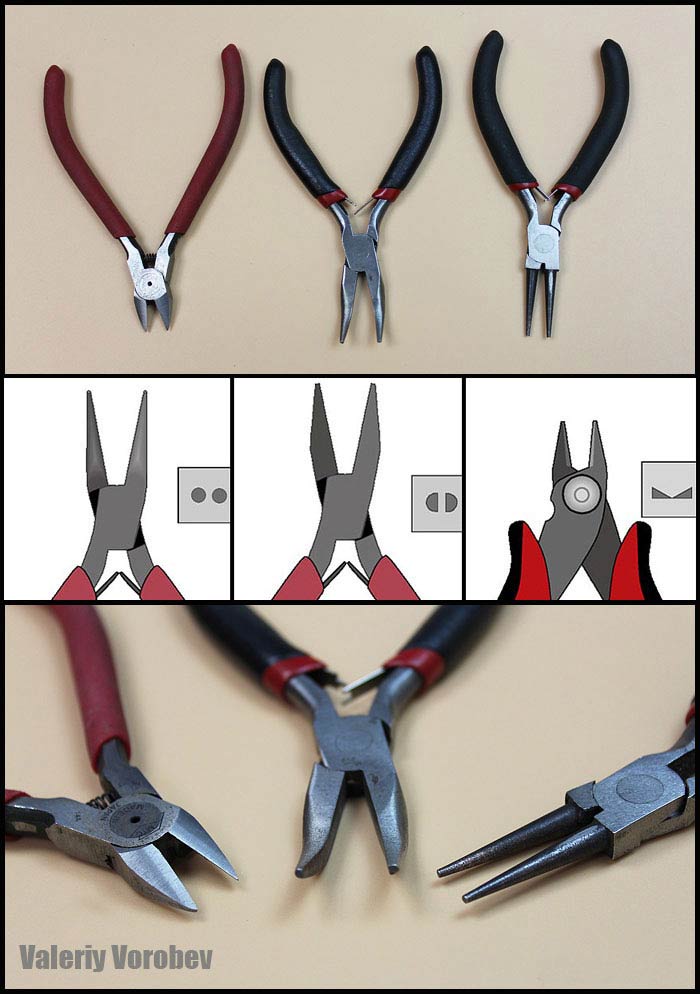
To make a wire wrapped bead pendant, we will need a very small set of hand tools.
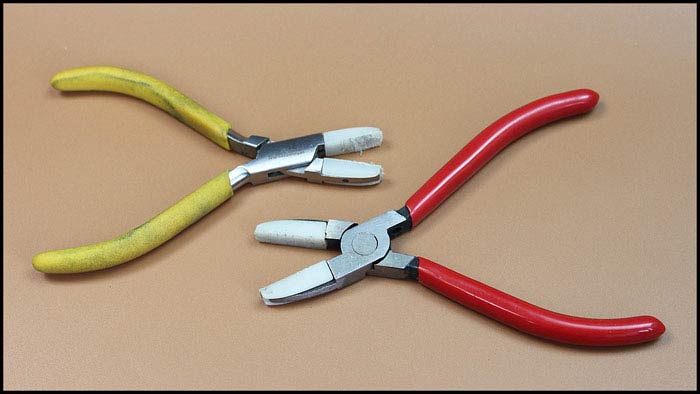
I recommend you to be sure to buy nylon tipped pliers. This is a very useful tool for wire weaving.
Step 4: Wire wrapped bead pendant tutorial step by step.
We need three pieces of 1mm thick natural copper wire, about 40 cm long. We also need lots of 0.4 mm fine wire. I hope you have enough of it. If not – always prepare a huge amount of thin wire because it is always in use while wire weaving.
We will need three beads with a diameter of 10 mm. Pay attention that the wire thickness of 1 mm should easily go through holes inside them.
Bend the two pieces of wire approximately in the middle. Do it as shown in the photo below.

So that the beads do not interfere with weaving put them aside.

Weave three wires together in any way, about 3-4 cm long. Check out my “Free wire basic weaving course”.

Put the first bead on the center wire. Bend the wire as shown in the photo. Follow the sequence.

Then add a second bead and bend the wire as in the photo.


Add a third bead and bend the wire as shown in the photo.

Weave three wires together using any technique. But don’t weave more than 1 cm.

Bend the wire back and make a loop for the cord. To help yourself you can use any round stick. I used a paint brush.

Sew the two weavings together on the back of the pendant. Use the thin wire from which you made the weaving for the loop.

Place (bend) the three wires on the front side of the pendant.

And keep weaving any way you want.

Bend the weaving around the beads. How do you bend the weavings evenly? I bend them with my hands, this is the most sensitive and accurate tool ever known. Sometimes I help myself with nylon tipped pliers. But be careful using this tool. Even nylon tips can easily damage the weaving.

Bend the weaving to secure it.

Cut off the excess wire and clamp the wire.

Bend the bottom three wires. Follow the sequence – just as shown in the photo.


We will weave two of them with thin wire.

Weave and bend around the beads.


Place the ends behind the pendant. It is better to sew a thin wire weaving to a loop. Thus, they will be firmly secured.

Cut the excess wire and bend inside the loop. Later we will add a cord to this loop.

We have one wire left.

Bend it around the beads and slip it into the loop for the cord.


Cut off the excess and bend so that the tip was inside the loop.


The main work is done. Examine the decoration, correct the flaws.

If you are not going to patinate and polish the wire pendant, your wire wrapped bead pendant is ready.
As for me, I want to improve my wire wrapped bead pendant.
Step 5: Patinating and polishing the copper wire.
I really like to patinate and polish copper pieces. The first reason is that after patination, the jewelry looks antique. It looks like it got blackened by time. Secondly, the pattern you create with weaving becomes more contrasting and expressive. The details of the weaving become visible.
Most often I use ammonia for patination. Ammonia in our country is freely available in small bottles in drugstores. I pour the ammonia into a glass jar with an iron lid. I hang the product over the ammonia solution. Over time, the copper begins to darken in the ammonia vapor. When the copper darkens to the desired color, you can take the item out of the jar.
There are many ready-made patination solutions sold in stores now, you may use them. But be sure to read the instructions for these solutions before utilizing them.
For polishing, I use a hand grinder with special felt tips. I also use polishing pastes.
After polishing I always wash the product with a brush and soap. If a little dirt is left on the stone, it can be removed with a wooden toothpick.
Over time, natural copper will darken. To prevent this, it can be covered with a special colorless varnish for metals.
If I make jewelry of copper, I always cover the product with varnish. But my wife has a lot of copper jewelry without any varnish applied. When they get darker, I just refresh them – polish them again.
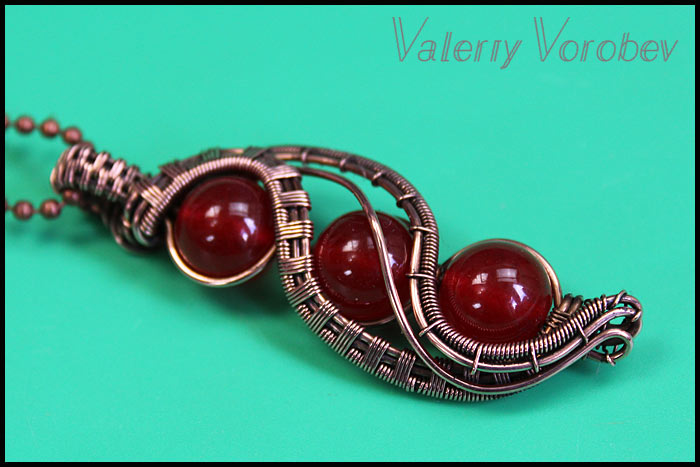
Add a chain or cord for your jewelry. The wire wrapped bead pendant is done. Now it can be worn, given as a gift or sold.

See related posts:

Wire wrapped tutorials Valeriy Vorobev