Polymer clay bead bracelet tutorial free. How to make polymer clay bracelet. Salt Texture Technique for beginners. Сlay color blending technique – The Skinner Blend. Baking instructions for polymer clay.
Today we are going to create a Polymer clay bead bracelet using polymer clay and fittings. We will make polymer clay beads with salt technique and color blending technique. We will put the beads on the jewelry cord and add beautiful accessories.

In order to make polymer clay beads for a bracelet, we will need.
Table of Contents
Blue and white polymer clay.
Paste machine.

Oven for baking clay.

A rolling pin or roller to roll out the clay
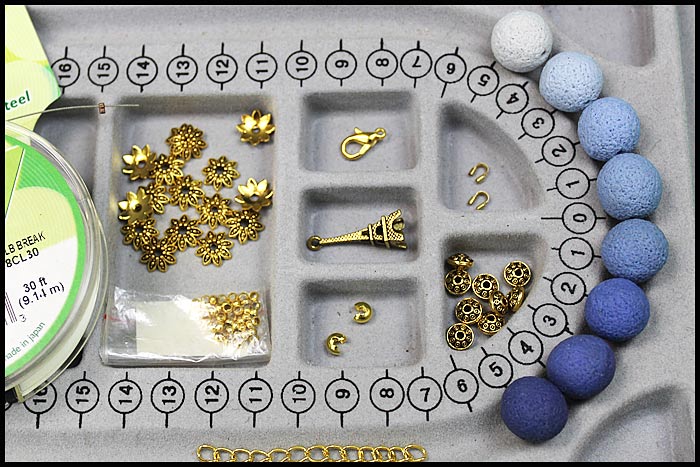
Fittings: bead cups, jewelry cord, clasp, intermediate beads, clasp beads, chain and pendant.

Ruler
Needle
Salt (sugar) or coarse sandpaper

Сlay color blending technique – The Skinner Blend. How to make polymer clay beads.
Roll out the blue and white pieces of polymer clay

Cut out the same squares.

Cut both squares into triangles.

Stack them on top of each other.

Connect the two triangles as shown in the photo.

Cut off the tips of the clay.
At this stage, you can cut the clay into equal strips and already roll beads from them. You need to knead the clay beforehand so that the colors are mixed evenly.

But we will use another way – moreover, we can learn how to make a smooth color transition – a gradient.
Roll out the clay with a rolling pin or pasta machine

Fold the polymer clay in half.

Run it through the pasta machine.

Fold in half again. Always fold the layers in the same direction.


Do this as many times as possible until you get a smooth color transition.

Cut off excess clay.

Cut the clay into seven equal strips. Use these strips to roll up the beads.

Salt Technique. The traditional way.
To create a spongy surface on polymer clay, salt or sugar is used. They are added to the clay or applied on top of the product before baking, and then removed by dissolving in water.
The larger the salt or sugar particles, the larger the pores in the clay.
This technique is called “salt clay” or “sugar clay”. It is one of the easiest techniques for working with polymer clay, so it can be recommended to beginners.
Each ball dip in the salt, roll them between the palms of your hands so that the salt will not crumble.

Put the pieces in the fridge for 15 – 20 minutes or in the freezer for 5 – 7 minutes.
Prick the balls with a needle from top to bottom, being careful not to deform them.
Bake them in an oven for 20 minutes at 110-120 C.
Dip the balls in a bowl of hot water and wait for the salt to dissolve.
How to make beads in the salt technique using coarse sandpaper?
I don’t really like to mess around with salt. In order to make salt beads, I use coarse sandpaper. I simply roll a polymer clay bead between two sheets of sandpaper. Thus, we can make some beads for our Polymer clay bead bracelet nicely and quikcly.


Then I make a hole in the bead. Insert a toothpick or needle into the bead and twist the needle into the bead with gentle pressure until the tip of the needle appears on the other side.

Turn the bead over and do the same on the other side.
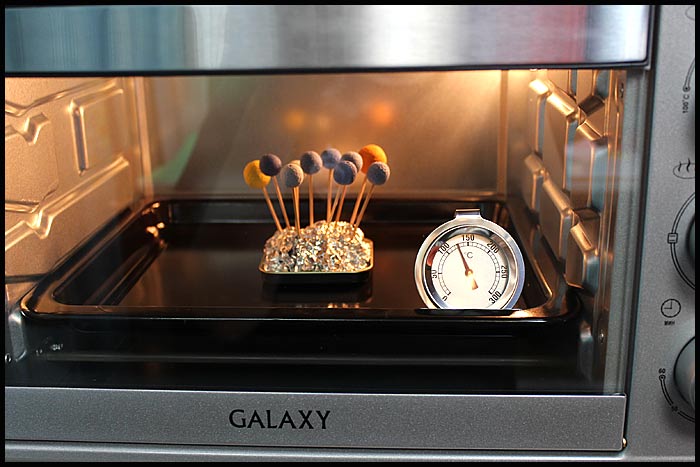
Baking instructions for polymer clay.
Roll all the beads on sandpaper. Make holes in all the polymer clay beads. Thread them onto toothpicks and place them on the crumpled foil.

Heat the oven to the proper temperature. The baking temperature is written on the package of your polymer clay.
After preheating the oven to the desired temperature, place the beads on toothpicks in the oven. Set the timer for the desired time. The baking time is also written on the package of your polymer clay.
After baking, let the clay cool down.
How to make a Polymer clay bead bracelet out of beads and jewelry cord.
You need to think about the design of your bracelet beforehand. You can simply assemble the beads on an elastic cord. This is also not a bad option.
I prepared metal fittings for the bracelet.
Watch an in-depth video – how to make polymer clay beads in the salt technique, how to make holes in the beads and how to assemble a Polymer clay bead bracelet on a jewelry wire.
Polymer clay bead bracelet tutorial free – video.
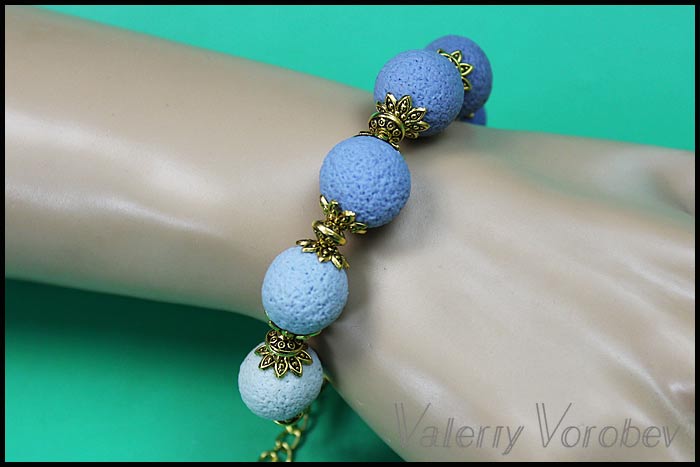
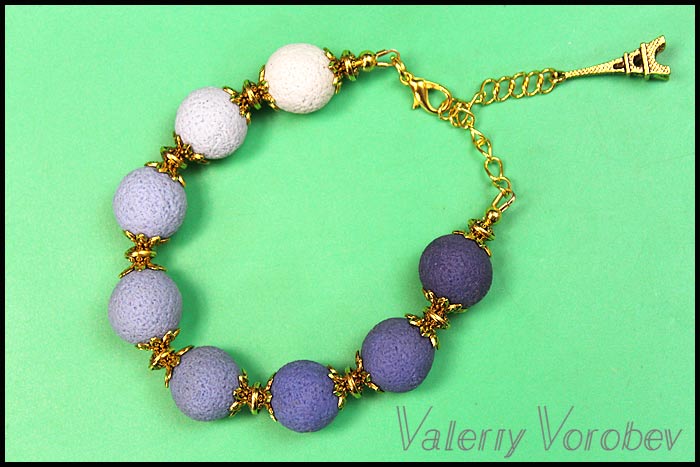
The bracelet is done. Today to make the polymer clay beads we used two techniques: Salt Texture Technique and Clay color blending technique (The Skinner Blend). We used a lot of different fittings to assemble the bracelet. We did a good and productive job today. And we ended up making a nice looking Polymer clay bead bracelet.
Popular posts:


Wire wrapped tutorials Valeriy Vorobev